Wednesday, September 24, 2014

A Redesign Was Needed

True to their word, my friends Mark & Gary showed up in Mark's Diesel work truck to assess and possibly begin the process of installing the four 300 watt solar panels to the roof of my Stealth Cargo Trailer home.

My Stealth Tiny Home (on the right)
 Upon further assessment the three of us jumped in Mark's truck and made our way to the local Lowe's and then Home Depot to purchase eight ten foot lengths of aluminum "L" shaped channel for around $160.

We also stopped at Starbucks for some much needed liquid energy in the form of caffeinated coffee and tea.

Gary is Marking the Aluminum for Cutting
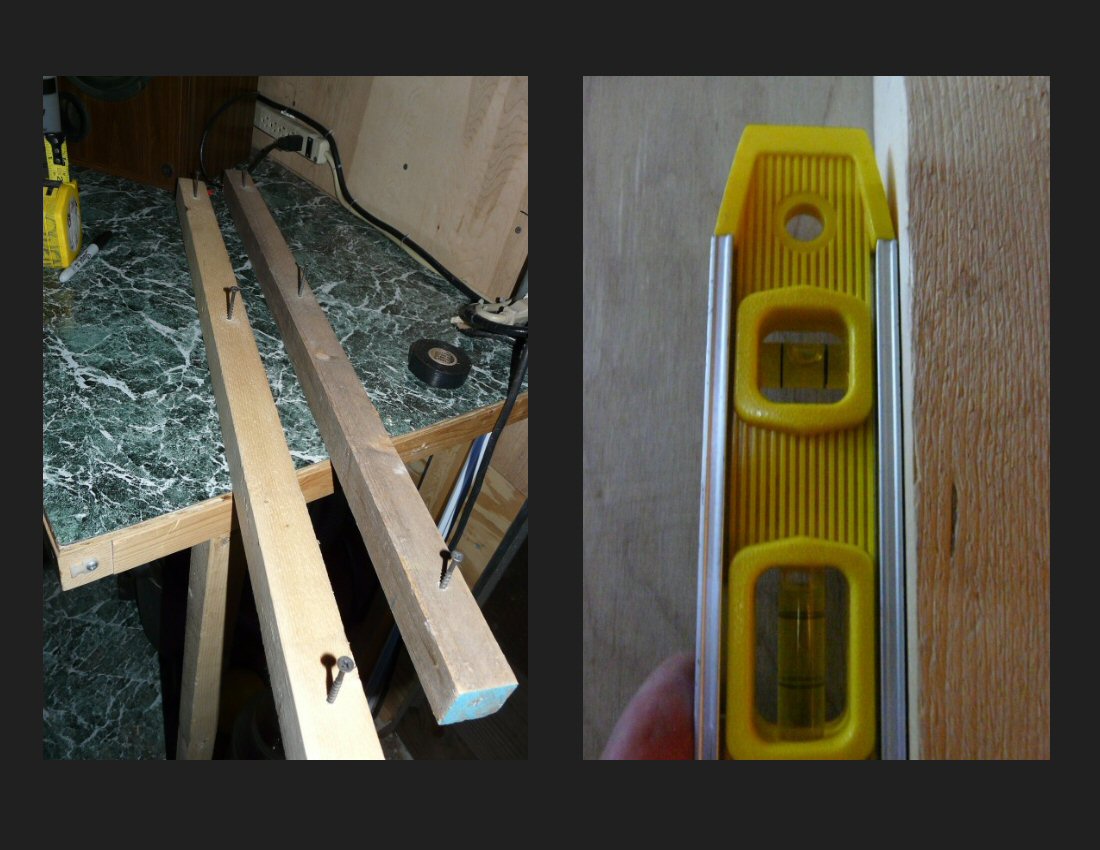
One solar panel sitting on a pair saw horses

When we returned Gary got up on the roof and determined how to best install the solar panels. After cutting the aluminum to the desired length and drilling holes for the bolts and lock washers, I was asked by Gary how I had planned on wiring the panels. 

I stated that I designed the system to be series-parallel wired where each set would be wired in series to double the voltage then the two sets would be wired in parallel to double the amperage yielding an array that would be putting out 92.4 volts @ 17.12 amps or 1581.888 watts maximum.

All he really wanted to know was how I was going to wire up the panels if they were already fastened to the roof making the wiring inaccessible. That is when we decided to postpone the duration of the wiring until after I were to obtain the photo voltaic cable, a crimper and additional MC4 connectors.

As soon as the crimp tool, wire and connectors show up, we will complete the installation of the solar panels with the wiring in place.


I look forward to completing this installation and I really appreciate Mark and Gary's commitment and expertise in this install.

Saturday, September 20, 2014

Solar System Update

I had hoped that the 4 large solar panels would have been installed by now but sadly that task has not been completed yet. The problem is that there are certain things that require more than just myself to complete the job. The installation of each 50 pound 6.5 x 3.5 foot panel takes at least 2 people to install on to the top of the cargo trailer. I cannot do this process by myself.

Lucky for me, My friend's Gary & Mark have volunteered to assist me in the installation of the panels. Both guys are going to come over on Sunday September 21st, 2014 to assess what is required to efficiently get the panels mounted to the cross members on the roof that tie the roof to the sides of the trailer. Safety is a prime concern which is why I want to make sure that when I'm towing the Cargo Trailer to a new location, there is no possibility that the solar panels would slide off and come down on a vehicle behind me.

I'm sure, after my friends assessment, I'll be sent to Home Depot or Lowe's to purchase the necessary hardware to prepare for the solar panel install. Wiring the Solar Panels is my job as an Electrician and can be accomplished relatively quickly once the actual solar panels are in place.

I am hoping to accomplish the other two projects (1. The On-Demand Hot Water system for the shower & 2. The Emergency Floor Exit) soon after I complete the electrical system.

I look forward to completing the solar charging portion of my electrical system because it is the most time consuming, expensive & potentially dangerous aspect of the projects to date.

I guess that's it for now... Have a great day!


Thursday, August 21, 2014

Beginning The Solar System Install

I'm back to work part time teaching fiber optics and associated disciplines to the telecommunications industry once more. The curriculum has changed a bit and the class I teach has gotten one third longer. I was rehired by the company that laid me off in 2008. I am looking forward to getting back to a 20 hour work week and It's great to be back in the work force once again

As far as the living space goes, I do not have any plans to stop living the way I live now in my cargo trailer. I dream of a time when I can live on a property that will last more than two years because moving every two years is kind of a drag. But I owe a huge thank you to my good friend Bob O. for letting me live on his property for this long. My stay in beautiful Juniper Hills California has been bliss and I believe that I couldn't have been any more content anywhere else.

My friend Bob is selling his home and moving back to his home state which means that once again it's time for me to begin the search for a new place to live. I am hoping that I can get on a property that is close to the freeway so that my commute is shorter than the 132 miles I drive round trip from home to work and back. I can't move too close to work because I am still attending college which is in the opposite direction from home.

I am almost done with the first part of my college education and the one class I am taking this semester will complete my goals for two associates degrees in graphic arts. Going to college has been a great deal of fun along with an equal amount of difficult academic work that I have not had much experience with prior to these past few years.

A few weeks ago My friend Pete and I took a trip to the San Fernando Valley in my pickup truck to buy some fastening materials to install my new solar panels. A few months ago I purchased 4 brand new 300 watt polycrystalline solar panels to install on the roof of my Cargo Trailer home. I designed the system to be wired in series-parallel to a 96 amp Midnite Solar charge controller which will charge my pair of 8D parallel wired AGM batteries. [I was a union electrician before I began my teaching career]

I am hoping that before I move to the next location I will have the 4 huge [6.5 ft by 3.5 ft] solar panels installed securely. Once they are installed I can do the necessary wiring to finalize my off grid electrical system.

If you or anyone you know needs a vibrant well spoken instructor to teach materials that are hard to comprehend while keeping the atmosphere light and humorous, feel free to send an email. If you can teach me, I can teach anyone! Until my next post... Take care!


Monday, May 5, 2014

An Update 2014

It's amazing to me how time flies. A lot of things have happened since my last post in 2012.

I have been living in the cargo trailer since July 8th 2010 and I have enjoyed every minute of it. I am now and have been for the past 3.5 years, the proud owner of my own home [on wheels] that is paid for and is mine. I do not pay any mortgage payments and the upkeep is practically zero. The best part is that If I choose to move from where I live now, my home goes with me. No more packing stuff in boxes, getting a lift gate box truck, taking a day or three loading all of the stuff into the box truck and then into the new place, only to pay some new landlord $550 to $850 a month to have my spot somewhere in southern California.. NO!

Today I live inexpensively in my cargo trailer and have money to spare working part-time if I so choose. Freedom from stuff is the new motto and I have been having one hell of a good time ridding myself of the stuff piece by piece. I have found that my happiness is directly contingent upon how much freedom I have to do what I want to do. I am no longer a slave to a job I hate with hours I hate and people who I'd rather not spend time with. Although I really do LOVE teaching fiber optics and hope to go back to work soon!

At present, I am still in college. I will graduate sometime later this year with two associates degrees in Graphic Arts. I joke with my friends about being in my 4th year of a 2 year degree because I have found so much fun in going to community college that sometimes I wish I could do this forever. I love learning new things and I really enjoy interacting with people of all ages.

I took ceramics as an elective a few semesters ago and learned how to make vases and things on the pottery wheel. I spent the first 3 of 16 weeks ruining things that I tried to make on the wheel but in my 4th week I was able to finally get something to stay upright and it eventually became a vase after its time in the kiln. I went on to create around 30 items from cups to plates and vases to bowls over the following 12 weeks. Ceramics was a lot of fun and I met some really engaging people too.

The cargo trailer project is close to over as far as the inexpensive projects go. The only things left are the off grid solar system and inverter, the on demand hot water system, the emergency exit and an air conditioning system that I may not bother with doing.

What I love about my no-windows cargo trailer is that I have a whole sound studio and three monitor computer setup with two additional laptops and surround sound completely built to my specifications by me as efficiently as possible all inside what looks like a large utility trailer on the side of my friends home. Is that cool or what?

What else? hmm

That new hose for the heater was never used because my friend Pete said that he thought that my propane system should be on a safer piped system. Pete said that If I bought the hardware, he would install the system. I specified the spots where I wanted shutoff valves and gas nipples [if that's what they are called?] and showed the layout to Pete. I towed the cargo trailer over to Pete's friend Bart's house and Pete went ahead and installed the whole system in two days including the platform that I bought that houses the automatic changeover valve for my two propane tanks on the extended trailer tongue. The whole installation came out really well and I now have a valve near where my floor heater goes, one for attaching a BBQ near the door, one for my existing super large single gas burner and one for the upcoming on-demand hot water system [that is yet to be installed].

And that's it for now, on this beautiful May 5th at 2:53am. Off I go to study for a math test I'm taking tonight, wish me luck! :)

Monday, February 13, 2012

The New Propane Hose

Yayyy.. The new propane hose showed up for my Mr. Heater MH18b propane heater!

There it is in all of it's glory! Now I don't have to refill the one pound containers. yayyy!

The Messy Audio Wiring

 Now that most of the studio equipment is installed I could focus on getting the underside wiring looking neat and clean.

Here are some pictures of that process.


The underside wiring was unsightly and hanging on the floor. I wanted to get the bulk of the wiring off the floor and up under the console where it would be more difficult to damage from wear.

 
Look at the mess! I need to get that mess looking clean and neat!

You never know when you're going to need a few feet of extra eight pair audio snake cable, so instead of cutting it to an exact measurement, I left a few feet neatly under the console just in case!


Wall Mounting the Monitors

When I purchased the new monitor I mentioned that I wanted to mount all of the monitors using wall mount fixtures when I had the money to buy them.  I have decided that the time has come to do just that.

I purchased one central wall mount fixture for the 27 inch wide screen monitor and two extended arm style wall mounts for the two 19 inch 4:3 monitors.

There are some pictures of the installation of the monitors to the wall mount fixtures.

The lower left picture shows the monitors on some makeshift stands that I fabricated quickly to use to determine a good mounting height for the monitors.

You can see that I am removing the stand for the 27" monitor to get it out of the way.

I have attached the monitor hanging brackets and begun leveling the back plate on the front facing wall.

I have now mounted the center monitor. The two side monitors will be fitted to match the top edge of the center monitor.

You can see that I have laid out the arm style mount and removed the stand from one of the 19" monitors.

Leveling is always important when installing any piece of equipment.

I have now mounted the left monitor and have transcribed the measurements to the right monitor to make that installation much easier.

I want to keep the monitor cabling looking neat and professional. This is a part of what I used to do for a living as a union sound electrician in the motion picture industry.

Here are two shots of the console area with the monitors all wired up and ready for use.

The New PC

Well the time has come where the laptop that I have been using is not really cutting it regarding the making of electronic dance music and editing high quality videos.  I bought the laptop from my friend Jerry for around $200 right after my previous living situation took a turn for the worse.  I'm the kind of person that requires Internet access 24/7 and I knew at that time that I could get by with a laptop until my situation changed for the better.

The new computer that I built starts out with a Lianli  aluminum PC case and is armed with a hexacore AMD Phenom x6 3.3 GHz processor (6 cores) and 16 Gigs of Corsair DDR3 RAM memory. The power supply is a 550 watt Kingwin Laser Platinum LZP-550. The PC also has an Asus 12x Blu-ray writer which is also a DVD and CD writer / player. I'm using an Asus M4A88TD-EVO USB3 Motherboard and a Scythe SCMG-2100RT aftermarket processor cooler. The internal hard drive is a Hitachi 2 Terabyte 7200 RPM SATA drive divided into two separate 1 gigabyte partitions. It runs Microsoft Windows 7 Professional 64 bit version.

The grand total for the all of the computer parts was $1,155.27 which is phenomenal when compared to the approximate $7200.00 I spent 5 years ago on my last Studio PC. Since I'm currently a full time college student, I used that status to purchase a student discounted version of MS Windows 7 64 bit Upgrade and MS Office Professional for around $150. I added my M-Audio Delta 1010LT sound card from my prior Studio PC to create one extremely amazing A/V Workstation.

Here are some pictures of the new computer and the area that I created to securely mount and wire my new Studio Work Station PC.

You can see the stack of new parts in the left picture and the new case in the right picture.


 I tried to lay out the parts so that you can see them all clearly.

Inside the syringe is thermal paste for connecting the processor to the fan assembly.
Here is the area under the console where I am installing the PC shelf.

I secured the metal shelf brackets to the wood with additional zip ties for added stability.
You can see the new computer under the console on the shelf.

Here are a few pictures of the inside and back panel of the New PC.

The top picture shows the added M-Audio Delta 1010LT sound card and the bottom picture shows a closer look at some of the connectors on the back of the computer.

Sunday, February 12, 2012

Console Shelving

The console area is very spacious but is lacking places to put additional pieces of equipment.  I decided I would fix that problem by installing some shelving above the monitors and to my immediate left and right. 

I purchased some adjustable shelf rails and additional hardware from the local home improvement store.  It is important that the shelving rail be level and secure.  I intend to mount the front right and left monitor speakers on the top right and left shelves.  I want the shelves to be adjustable so that in the future if the equipment I own changes I won't have to redo the shelving situation.

Here are some pictures of the installation of my new shelves.


A New Monitor

The two 19" Princeton Synergy LCD monitors that I have are nice, but I needed something newer. Movies made for widescreen viewing don't look right on 4:3 monitors. I decided to get a brand new ASUS VE278Q 27 Inch widescreen 16:9 LED monitor.  It cost around $400 with tax and shipping and it uses very little power because it is back lit with LED's instead of the more traditional LCD back lighting.

Here are some pictures of my new monitor.


I intend to mount the monitors on arm mounts from the wall when I have the money to buy the mounting brackets. I figured that I better mount the power supplies for the two 19" Princeton Synergy LCD monitors to their respective stands for the time being to keep the wiring off of the console surface to the best of my ability.

Here is the outcome of how I accomplished that task.


Saturday, February 11, 2012

Back To School

My third semester as a full time college student has begun.  I have lived inside this cargo trailer for almost a year and a half.  I have everything I need except that I still have to shower at friends' houses and I still do my laundry at the Laundromat.  I finally broke down and joined a fitness center a few days ago.  I laugh when I tell people that I was working on getting fat, but now that I am fat, it's important that I lose all that weight so I can start over.  It's my weird sense of humor.

I have at least 12 more posts to make before I get close to being caught up to my current situation.  I have tried to document every important step in the process of turning the inside of this cargo trailer into a home.  When it's all done I'm going to have thousands of pictures depicting practically every facet of the build from start to finish.

My studio area in the cargo trailer has evolved into a magnificent studio / office / workspace.  I designed the area to function as an Internet Radio Station, a Live DJ Console, a Workspace to do homework, and an Office complete with a Computer, Color Laser Printer, and Flatbed Scanner.  My friends who live in houses are very impressed with my compact and efficient studio area.

Wednesday, February 1, 2012

The Progress Made So Far

You're probably wondering at this point what the inside of the cargo trailer looked like after all of the many changes.  Here are some pictures of my progress.


The picture on the left shows my electric ceramic heater tilted down at an angle so I can warm up when needed. Just above the heater is the Center Channel speaker that I mounted in an earlier post. Just below the heater are a pair of Logitech powered PC speakers and a Philips webcam.

The pictures on the right show the progress on the studio console area before and after I surfaced the counter top with the fake green marble adhesive tiling and the addition of wall mounting my two 19" Princeton Synergy LCD Monitors.


The top left picture shows my laptop setup with an external keyboard and Logitech trackball. You can also see a better view of the pair of wall mounted 19" Princeton Synergy LCD Monitors. My Saturn SL1 car and My GMC Sierra Pickup truck are  in the bottom left picture. The picture on the right shows the kitchen shelving being used and some of my clothes hanging up in the closet area.

The Revamped Shower Installation

On Tuesday, August 31, 2010 I posted the framing of the bathroom walls.  At that time I installed the walls without knowing exactly how I was going to build a shower/bathroom.  When I tackled the process again I knew some changes had to be made which included modifying the furthest wall to measurements of 3' x 3' and installing a shower dam.

I made new lines on the wall, reconnected the furthest wall to the floor and cargo trailer wall, and then connected the showered dam to the floor and both shower walls.  The exact inside dimensions are 3' x 3' which should definitely be large enough for myself and possibly someone else to both take a shower at the same time... :D

Here are some pictures of the revamped shower installation.


Additional LED Lighting

Back on October 15, 2010 I created a metallized burner area for a Kings Kooker brand propane burner that my friend Jerry gave me.  Jerry found the burner at a yard sale and paid $15 for it.  The area where the Burner is located is very dark at night so I thought I would spruce it up a bit by adding some switched 12 volt LED rope lighting to that area.

Here are some pictures of that installation.


Tuesday, January 31, 2012

Soldering LED Rope Lights

In order for the LED rope lighting to be installed it first needs to be cut and soldered at the appropriate lengths.  Here are some pictures of a soldered length of LED rope light with some added shrink tubing.

Console Electric

The initial wiring is complete and I'm happy to say, but I still need to install the four power strips.  Two power strips will extend from the two switched outlets on the left, and two power strips will extend from the two switched outlets on the right.

Here are some pictures of the wiring of the power strips in the console area.


Switched Outlets

I was sitting at the console trying to decide how to wire the console portion of the AC electrical system in the cargo trailer. I knew that I wanted to provide myself with an easy way to shut off a whole bank of power outlets.

 I decided that I would wire the console electrical system utilizing 4 sets of electrical switches and each would control one power strips worth of outlets.  I believe that the switched outlet system will make it easier to control power use inside the cargo trailer as long as I pay attention to where I plug in various items.  Here are some pictures of that wiring process.


Tiling the Console Area

The green marble adhesive tiling that I ordered online from Amazon.com finally showed up and I knew it was time to get busy tiling the floor and the counter top surface in the console area. 

I decided to start with a counter top surface and then work my way to the floor.  I wanted to get the counter top done first because I had to move all the stuff that was on top of the counter top to other locations. Here are some pictures of the resurfacing of the counter top with adhesive tiling.


I knew that when I was done with the counter top, not only could put back the stuff that was on top, but I can also add new things that may have been on the floor.  Here are some pictures of the process of resurfacing the floor with the same adhesive marble tile.