Tuesday, August 31, 2010

Framing the bathroom walls...

I began the framing of the bathroom walls because I wanted to have additional stability for the utility shelves that I had just built. The left edge of the utility shelves was sagging a bit.


I had to make a cutout for the metal wheel well cover in the wood that creates the first bathroom wall. I covered the wall with the super thin Luan board that I mentioned before.


I intend on making two more walls for the bathroom but I'll have to wait on them until I get more wood.

You may have noticed that the offset vent is perfectly set above where the bathroom is located. This is exactly why a good plan is always best before taking on a project like this. :)

Click HERE to see a slide show of the photos from this post.

Pictures of my cargo trailer... outside

Here are some pictures of the outside of my cargo trailer. As you can see, there are no windows. I want to keep the cargo trailer on the outside looking as authentic as possible. The stealth aspect removes any possible threat since people don't normally associate a cargo trailer with a living environment.

Click HERE to see a slide show of the photos from this post.

Utility Shelves and Laser Printer area...

No home is complete without a color laser printer or utility shelves.. in my opinion anyway.

Just to the left of the Console was an area that looked like it would be great for my color laser printer.

I would want to store paper under it and use the overhead shelf as a plastic bin holder.
The sleeping area had a lot of space above it and I wanted to make use of it.

I set out to create an area where four of the large plastic bins that I have could be stored.

I had to prefab a lot of the project before putting it up and securing it to the wall.


I braced the front edge of the shelves to the Laser Printer shelf on that end, and when the bathroom wall is built, I will brace that to the other end of my utility shelves.

Click HERE to see a slide show of the photos from this post.

Starting the kitchenette..


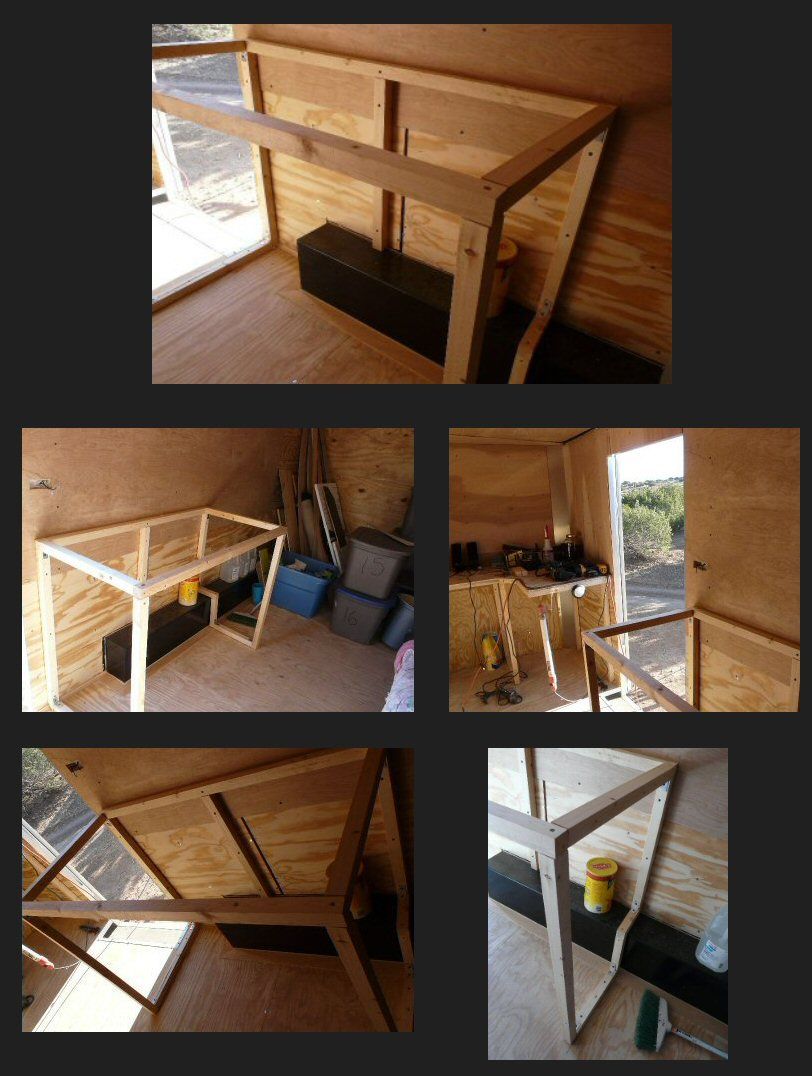
Now that the Console/Desk area is partially done, I could move on to the Kitchenette area and begin building the basic layout.

I designed the Kitchenette area to accommodate the three plastic drawer organizer things that I got at Walmart. I have alot of three drawer organizers but the white ones seem to be made with less materials.


I created spaces that will allow for the use of any three drawer organizer that fits within the specification of the two types that I have right now.

I wanted to use the Kings Cooker burner that my friend gave me and
I wanted it to be nearest to the door.
 The burner uses propane to cook, and I wanted plenty of ventilation in that area.

I also wanted that same area to double as an area that would hold a second type of stove if I needed it.


I'm happy with the outcome of the Kitchenette area for now... there's lots more to do....

Click HERE to see a slide show of the photos from this post.

Monday, August 16, 2010

The Console / Desk


The console area was a huge job because I wanted to maintain the attractive wood look and also cover up any seams.
I installed an extra one foot strip of Luan wood below the panel that was already installed.

Then I carried the theme to both sides of the Console area.


Now it was time to build the desk portion.

I decided to frame the desk using 2 x 2's and 3/8 ply to provide a sturdy enough workspace and reduce the overall weight.


I knew that the work surface was going to be a challenge because of the rounded nose shape of the trailer. I had to scribe the surface parts to make them fit properly.


Click HERE to see a slide show of the photos from this post.

And the inside...

You can see my butane fueled burner in the top right picture. I use that burner to cook my lunch every day.

The other pictures show how empty the trailer really is at this point.

Now that the insulation portion is over, I can get busy building out the remaining areas of the trailer.


All of my tools and other stuff is strewn all over the floor.

The first area I will focus on building is the Console area at the front of the trailer.

Click HERE to see a slide show of the photos from this post.

On the outside...

Here is a view of the Cargo Trailer from the outside. You can see my tools lined up on the railroad ties.

There's a fan I modified to work on 12 volts, my tool bag, my laptop and some extraneous stuff.

I was notified that the trailer has to be moved because my friends neighbors were complaining.

I will move it to a new location as soon as I can find one...

Click HERE to see a slide show of the photos from this post.

Wednesday, August 4, 2010

Vent trim...

The trim on the vents are finished too. The rear vent has a wider trim ring because I believe it will be over my bathroom / shower area and I thought it would look better. The front vent has a regular type trim ring.

Click HERE to see a slide show of the photos from this post.

AGM Batteries [Absorbed Glass Mat]

I purchased two [2] used AGM Deep Cycle Marine batteries from a guy on eBay.  Here are the specs...

Now I have to do some research on how to charge these things... Averaging 1875 Amps per battery at 12 Volts, these batteries have more than enough current available for all of my power needs. [and then some...lol]

Click HERE to see a slide show of the photos from this post.

The Finished Ceiling

My friend Jerry and I completed the ceiling paneling.
Now every wall has insulation. Jerry skillfully cut the rounded piece to finish off the ceiling.
We used the extra piece of Luan board on the front wall

Click HERE to see a slide show of the photos from this post.

Door Spring adjustments

My friend and I adjusted the door springs so that the ramp will lay flat when I open the rear door.

The springs were originally set for the weight of 3/4 plywood, but with the 3/8 plywood being so much lighter in its place, the rear door would not stay open anymore.

The rear door stays open now!  Yayyyy!

Click HERE to see a slide show of the photos from this post.